I told my wife that I would like to design a paint for our home decoration in the beginning of the 2009, but she would not believe me. She thought that I would not have the time and skill, so to prove myself, I made this water color paint as my first new year resolution in 2009.
This was just a practice, and I am planing to make a bigger one so I can hang it on the wall. Probably will frame the paint as well. It probably will be my next project.
Step 1: Sketch the outline
Step 2: Add first layer of color
Step 3: After the first layer is dried, add the second layer
Step 4: Add background cloud
Step 5: Completed!
Friday, August 21, 2009
Sunday, July 19, 2009
Home Improvement Project - Base Shoe
After I finished the laminate floor project, there is still a gap between the floor and the base board. Ideally, the base board should be removed before working on the floor, however, it is time consuming to remove all base board, install floor, put back the base board, and then re-paint the base board. To save time, we can use base shoe without removing any base board.
Base shoe is like a crown molding in my opinion. There will be a lot of 30 or 45 degree cut to make corners look a lot of nicer. Thus, Miter Saw will be a nice fit for this project. I was using this less power tool borrowed from my colleague Po(thanks). This is an awesome tool because it does do the job very nicely.
In addition to the saw, I also need a nail gun to save time. Using hammer is not only time consuming but also error prone. I highly recommend to use a nail gun instead. There two kinds of nail gun. Air-compressed nail gun is much powerful, but you will need to purchase a separated air compressor. Electric nail gun is less powerful, but for this kind of project it is sufficient. The key ingredient of the project - Base shoe.
We will also need paint and brush for the final finish.
Everything is ready, now let's begin.
Step 1: Measure the width and cut the base shoe roughly.
Step 2: Cut 45 degree angle for the corner. Some corners require 30 degree angle which will take more efforts.
Step 3: Drive the nail to the base shoe and wall. This will close the gap shown in the picture.
Step 4: Brush the paint to give it the final touch.
Step 5: Completed!
Reference:
1. http://www.ehow.com/videos-on_4990_install-base-shoe-molding.html
Saturday, July 11, 2009
Home Cleaning Project - Bug Terminator
We found some tiny black bugs on the wall near the roof area. We are not sure what they are but they certainly won't be a good thing. Thus, with the scientific spirit in my blood, I would like to figure it out before it cause catastrophic disaster.
To figure it what the bug is, I will need a microscope. I prefer an USB digital microscope that can connect to my computer and capture snapshots easily. I am using a Mac, so I need one that is compatible with MacOSX too. Buy.com has Carson for $49 which is on sale, but I went to a local Frys to pick up Celestron Handheld Digital Microscope(up to 150x) just for the convenience. unfortunately, Celestron does not have good support for Mac because it require me to find some image/video capture application on my own instead provide a default one in the box. After some researches on the Internet, I ordered a more powerful USB microscope(Veho VMS-004 - up to 400X) from J&R.com.
Step 1: Catch a bug.
Step 2: Take a picture. Say Cheeze!
> Front view: 40x
> Top view: 150x Close up
> Bottom view: 150x
Step 3: Google it to find matched photo. We found a similar match on Pest Control Canada via google image service(thank you, google :-)). We thought that the bug we found was "Carpet Beetles". I was not 100% sure about this, so I sent an email to get the confirmation from Pest Control Canada web site below. However, after we've done the research for a few weeks, we were certain that it was actually a "bird mite".
> Bug list web site: PEST CONTROL CANADA - Pest Information & Control Solutions
Step 4: While waiting for the confirmation, I Googled the solution of how to terminate "Carpet Beetles". Here is a very good source.
> Reference: How to Get Rid of Carpet Beetles
Step 5: Based on the reference, I decided to buy "Boric acid" and "Mothball" to kill and keep bugs away. Plus a steam cleaner to deep clean the carpet and put possible affected clothes and sheets to the washer and dryer for a good treatment.
Step 6: Get cleaning equipment ready and vacuum the carpet first.
Step 7: Steam affected areas.
Step 8: Wipe out bug's bodies.
Step 9: Spray "BugOut" to affected areas as the first defense wall.
Step 10: Spread Borax to affected areas too to build the 2nd defense system.
Step 11: Stream clean the carpet to kill any bugs already invaded.
Step 12: Put Mothballs in the closet as a prevention measure.
To figure it what the bug is, I will need a microscope. I prefer an USB digital microscope that can connect to my computer and capture snapshots easily. I am using a Mac, so I need one that is compatible with MacOSX too. Buy.com has Carson for $49 which is on sale, but I went to a local Frys to pick up Celestron Handheld Digital Microscope(up to 150x) just for the convenience. unfortunately, Celestron does not have good support for Mac because it require me to find some image/video capture application on my own instead provide a default one in the box. After some researches on the Internet, I ordered a more powerful USB microscope(Veho VMS-004 - up to 400X) from J&R.com.
- Celestron (up to 150x)
- Veho (up to 400x)
Step 1: Catch a bug.
Step 2: Take a picture. Say Cheeze!
> Front view: 40x
> Top view: 150x Close up
> Bottom view: 150x
Step 3: Google it to find matched photo. We found a similar match on Pest Control Canada via google image service(thank you, google :-)). We thought that the bug we found was "Carpet Beetles". I was not 100% sure about this, so I sent an email to get the confirmation from Pest Control Canada web site below. However, after we've done the research for a few weeks, we were certain that it was actually a "bird mite".
> Bug list web site: PEST CONTROL CANADA - Pest Information & Control Solutions
Step 4: While waiting for the confirmation, I Googled the solution of how to terminate "Carpet Beetles". Here is a very good source.
> Reference: How to Get Rid of Carpet Beetles
Step 5: Based on the reference, I decided to buy "Boric acid" and "Mothball" to kill and keep bugs away. Plus a steam cleaner to deep clean the carpet and put possible affected clothes and sheets to the washer and dryer for a good treatment.
Step 6: Get cleaning equipment ready and vacuum the carpet first.
Step 7: Steam affected areas.
Step 8: Wipe out bug's bodies.
Step 9: Spray "BugOut" to affected areas as the first defense wall.
Step 10: Spread Borax to affected areas too to build the 2nd defense system.
Step 11: Stream clean the carpet to kill any bugs already invaded.
Step 12: Put Mothballs in the closet as a prevention measure.
Monday, June 29, 2009
Game Console Modification Project - DIY Wii Software Hack
Wii is a popular game console because of its unique user interaction experience. It has a built-in DVD but users can not play the real DVD movie using the console. Besides, it was not possible to play a backup game either.
People started to come up with different hardware solution to make this little box more powerful such as Modchip. Lately, some smart people come up with the pure software solution require no hardware modification. I follow the same instruction and it did work for me. I can now play DVD movie and backup games without any issue.
Preparation:
You will need to have a Homebrew Channel(HBC) ready before you start the following steps. There are several ways to install HBC to your Wii(ex. Twilight Hack, Bannerbomb) and I used Bannerbomb.
Instruction:
http://wiibrew.org/wiki/BaNNeRBoMB
Download:
http://bannerbomb.qoid.us/
Step 1: Clean the system (you can skip this step if it is your first time hacking the system)
http://www.91wii.com/attachment.php?aid=6782&k=b73fccff0a899f7329eba5a1da302882&t=1246091998
Step 2: Download "Fix4.0-NeXtRL.rar" and unpack it. You will see "apps" and "wad" under the SD folder.
http://www.91wii.com/attachment.php?aid=6773&k=110693a5f427f5b4238fa6bbc896ae7d&t=1246091998
Step 3: Do a full backup of your SD card before you wipe out everything on the SD card. After it is done, copy just the "apps" folder to your SD card under the root directory.
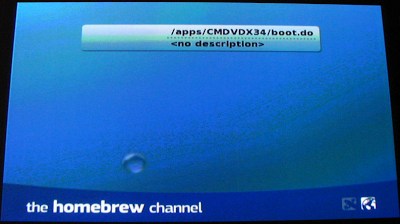
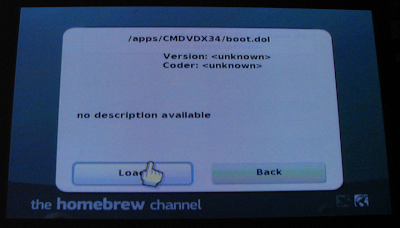
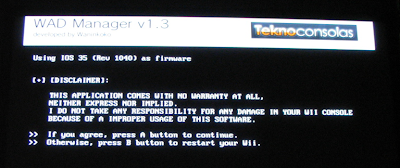
Step 4: Turn on the Wii. Launch the Homebrew Channel and select CMDVDX34, and then pick "Downgrade IOS35", wait for it to end and come back to the menu, then exit.
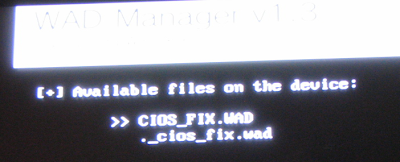
Step 5: Download cios_fix.wad and copy it to the SD card under the "wad" folder in the root(create a new folder named "wad" in the root).
Download:
http://uploaded.to/?id=l7k1h5
Step 6: Delete the apps folder on the SD. Now your SD card only has the "wad" folder. Then copy the "apps2" folder in "Fix4.0-NeXtRL.rar" we extracted before and rename it to "apps" on the SD card.
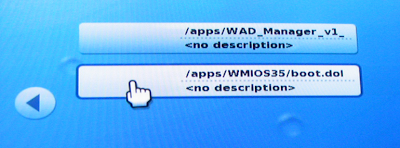
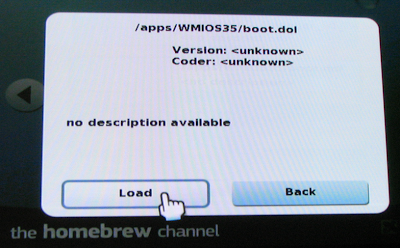
Step 7: Insert the SD card to Wii and restart your Wii. Launch the Homebrew Channel again, and run WMIOS35 in the "apps" folder.
Step 8: Then install cios_fix.wad.
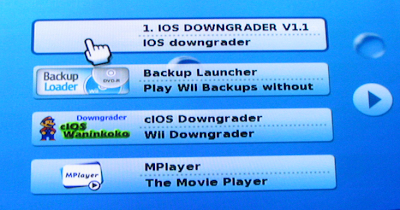
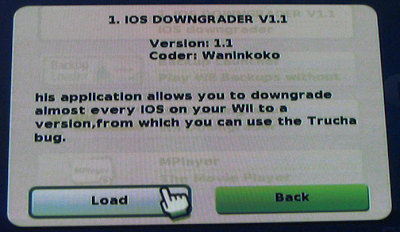
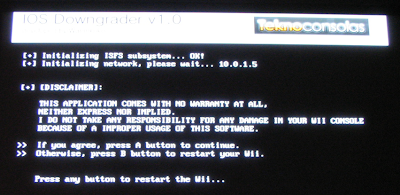
Step 9: Exit again, and run IOSDowngraderv1 in the "apps" folder from Homebrew Channel(HBC).
Step 10: Download and install DVDx via HBC. Create a new folder for it and put it in the "app" folder of your SD card.
http://hackmii.com/2008/08/libdi-and-the-dvdx-installer/
Step 11: Download and install cIOS36 rev 10 via HBC. Create a new folder for it and put it in the "app" folder of your SD card.
Info: http://www.mediafire.com/download.php?zdztqgmtnyn
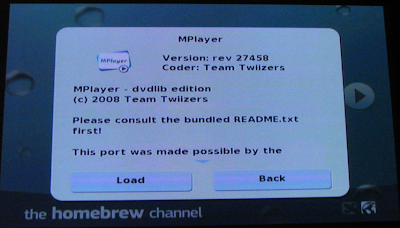
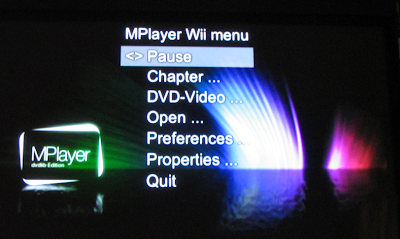
Step 12: Download and install mPlyaer to play DVD movie on your Wii. Create a new folder for it and put it in the "app" folder of your SD card.
Info: http://www.mplayerhq.hu/design7/news.html
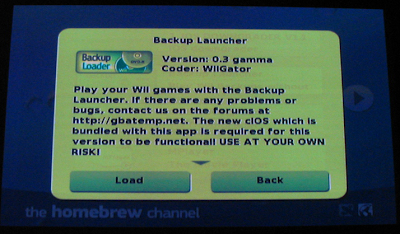
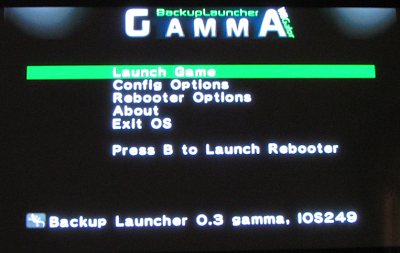
Step 13: Download and install Backup loader for playing your DVD-R backup games. Create a new folder for it and put it in the "app" folder of your SD card.
Download: http://dl.qj.net/Backup-Launcher-0.3-gamma-Wii-Homebrew/pg/12/fid/24846/catid/526
Step 14: Download and install USB loader so you can play your backup games from a SD card or USB hard drive instead of DVD-R.
Info: http://www.usbloader.com/
Reference:
1. http://wiibrew.org/wiki/IOS_History
2. http://wii.cngba.com/wii_pj/2009051270463.shtml
3. http://keisuke08.pixnet.net/blog/post/23646457
4. http://keisuke08.pixnet.net/blog/post/23642771
5. http://wiibrew.org/wiki/WiiBrew:FAQ
6. http://hackawii.com/
7. http://keisuke08.pixnet.net/blog/post/23666503
Wednesday, June 24, 2009
Home Improvement Project - DIY Laminate Floor
Last weekend, I replaced the carpet floor with laminate floor. Laminate floor is a kind of a floating floor. It means that there is no nail or glue needed for the installation and the whole floor is not stick to the ground or anything. The installation was harder than I thought originally because of the lack of experience. In fact, everything went pretty well initially except the choice of tooling. Here is a list of tools that must get ready before the project.
1. Claw bar (carpet removal)
2. Utility knife (carpet removal)
3. Laminate floor
4. Underlayment(barrier)
5. Duck tape
6. Measuring tape
7. Saw
8. Hammer
9. Spacer, pull bar, and tapping block
10. Base shoe and nails
11. Transition/Reducer
The first problem I faced was the choice of saw. There are table saw, miter saw, and hand saw. Ideally, it will be very handy to have them all. However, my dear significant other did not like anything that is too big or too powerful or noisy. I bought table saw but it was too big and too noisy so I had to return it. I also tried Sabre saw(jig saw), but the one I bought did not have a laser guide, so the hand must be very steady in order to cut a straight line which was hard.
The major problem of this project other than the tooling was the choice of floor material. Since I worked on a rental property, we don't want to use very good and expansive materials. Since the laminate floor I use was only $.79 per square feet, it was very easy to damage the locking edge when using the hammer with tapping block(the solid plastic block). If I will do it again, I will choose a laminate floor that is thicker and stronger. I wasted about at least a box(8 pieces) of laminate floor because of this issue.
Lesson learned:
1. You must have proper tools to save your time and make it professional: Ex. Hand Saw, Table Saw, Miter Saw, and Nail Gun.
2. You must buy a quality material instead cheap one where its locking edge can be easily damaged.
3. You must make sure the floor is flat: Level it before starting working on it and make sure the underlay does not causing imbalance.
Tools you will need:
Step 1: Remove transition
Step 2: Remove the old carpet
Step 3: Remove padding.
Step 4: Remove nails and clean floor
Step 5: Put underlayment
Step 6: Remove exceeding edge or tuck in the extra underlay:
Step 6: Take a break...
Step 7: Trim the edge of planks for the first row(otherwise the gap between the first row and wall will too large)
Step 8: Get the table saw ready(the first plank of the 2nd row should be a half of the previous row)
Step 8: Put planks together
Step 9: Add transition
Step 10: Mission accomplished
Reference:
1. http://www.birbek.com/articles/installing-an-engineered-hardwood-floor.html
2.
1. Claw bar (carpet removal)
2. Utility knife (carpet removal)
3. Laminate floor
4. Underlayment(barrier)
5. Duck tape
6. Measuring tape
7. Saw
8. Hammer
9. Spacer, pull bar, and tapping block
10. Base shoe and nails
11. Transition/Reducer
The first problem I faced was the choice of saw. There are table saw, miter saw, and hand saw. Ideally, it will be very handy to have them all. However, my dear significant other did not like anything that is too big or too powerful or noisy. I bought table saw but it was too big and too noisy so I had to return it. I also tried Sabre saw(jig saw), but the one I bought did not have a laser guide, so the hand must be very steady in order to cut a straight line which was hard.
The major problem of this project other than the tooling was the choice of floor material. Since I worked on a rental property, we don't want to use very good and expansive materials. Since the laminate floor I use was only $.79 per square feet, it was very easy to damage the locking edge when using the hammer with tapping block(the solid plastic block). If I will do it again, I will choose a laminate floor that is thicker and stronger. I wasted about at least a box(8 pieces) of laminate floor because of this issue.
Lesson learned:
1. You must have proper tools to save your time and make it professional: Ex. Hand Saw, Table Saw, Miter Saw, and Nail Gun.
2. You must buy a quality material instead cheap one where its locking edge can be easily damaged.
3. You must make sure the floor is flat: Level it before starting working on it and make sure the underlay does not causing imbalance.
Tools you will need:
Step 1: Remove transition
Step 2: Remove the old carpet
Step 3: Remove padding.
Step 4: Remove nails and clean floor
Step 5: Put underlayment
Step 6: Remove exceeding edge or tuck in the extra underlay:
Step 6: Take a break...
Step 7: Trim the edge of planks for the first row(otherwise the gap between the first row and wall will too large)
Step 8: Get the table saw ready(the first plank of the 2nd row should be a half of the previous row)
Step 8: Put planks together
Step 9: Add transition
Step 10: Mission accomplished
Reference:
1. http://www.birbek.com/articles/installing-an-engineered-hardwood-floor.html
2.
Subscribe to:
Posts (Atom)